Using ResOnline with ResBook PMS (3) | How To Create Rate Packages
Before completing the connection of ResBook PMS and ResOnline, we need to create some rate packages to attach to our stock units and classifications.
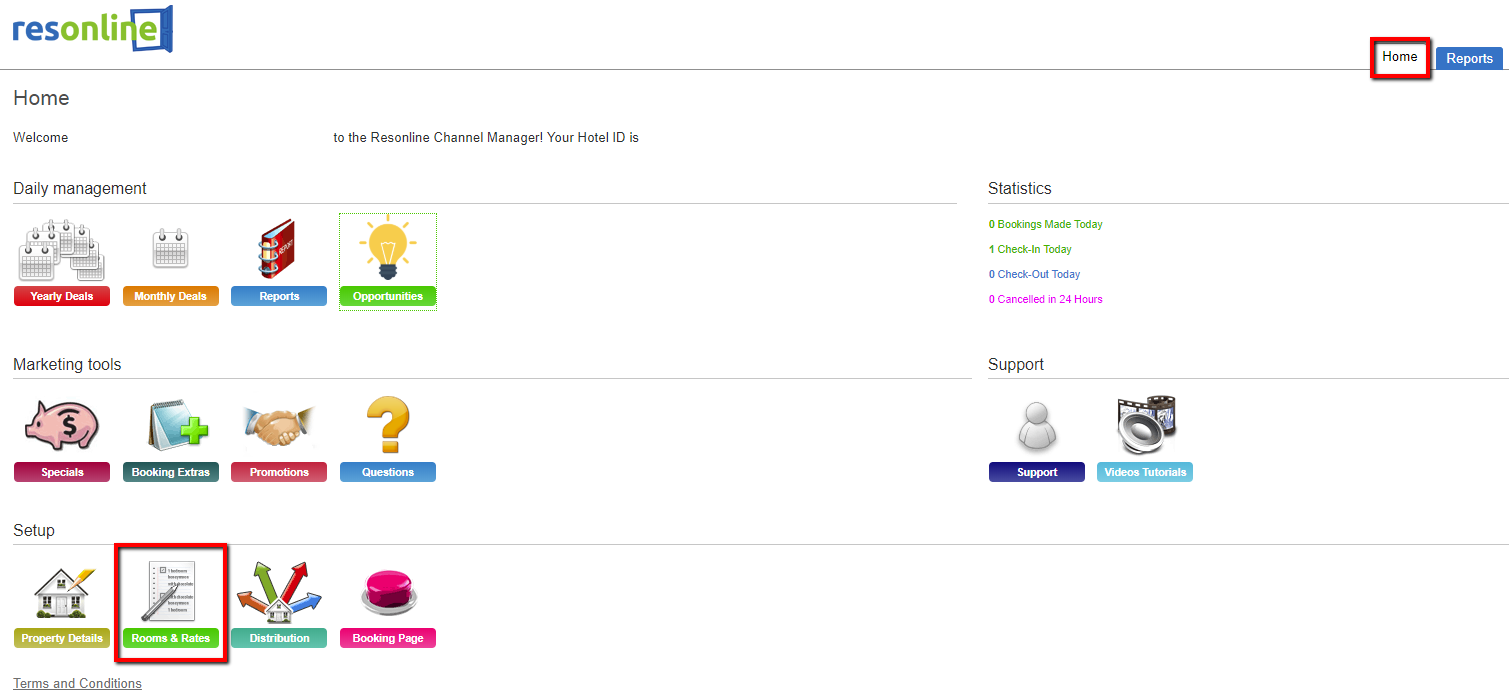
After entering your 'Property Information', click on the ResOnline logo at the top of the screen to return to your home page. From this home page, you now want to click on 'Rooms & Rates' which is under the 'Home > Setup' heading.

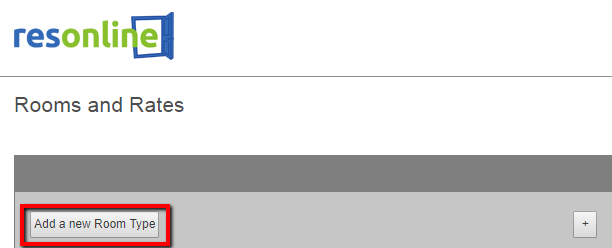
Once you have click on this, the 'Room and Rates' screen will appear. To create a new Rate Package, we first have to create a Room Type. Click on the [Add a new Room Type] button to get started.
The first thing you will need to do is name your new Room Type. From there you can change the number of bedrooms & bathrooms; set the bed configurations, and add room features if you so choose. However, the only thing that is required is the Name of your new Room Type.
Once you have filled out all the fields you want to, go to the top right hand corner of the screen and you will see a button called [New Rate Plan]. Click on this button.
Here is where we will get the information required to connect our ResOnline account to ResBook PMS. First, you will need to name the rate plan, and give it a short description. However, we suggest filling out the entire first section of this page.
Following on from this, you will have a heading called 'Year Round Defaults'. Here you will need to decide whether or not you want to include some rates in this rate package or not.
- If you decided to enter rates here, these rates will go onto further channels you connect ResOnline to.
- If you decided to leave them empty, you will be able to push rates from ResBook PMS to use instead.
Note that if you do enter rates into ResOnline, they are set for a 12 month period, and they will overwrite existing rates you push from ResBook PMS if you have set your rate period in ResBook PMS less than 12 months from the date of setup.
Once you have finished here, scroll down to the bottom and hit the button that says [Save Changes] to save your progress.
You have now created your Rate Package. We are now ready to connect to ResBookPMS.
Click here to continue to Part 4: Connecting ResOnline to ResBook PMS
