
In this guide we will cover:
- Adding an image to File Manager
- View images in full screen
- Download an image from File Manager
- Edit an image within File Manager
- Copying Files from one Folder to another Folder within File Manager
- Moving Files to another Folder within File Manager
- Renaming Folders and Files
- Maximise your view of File Manager
- Locate files using the Filter option
- Deleting a file or folder
- Customise your view
Adding an image to File Manager
View images in full screen
-
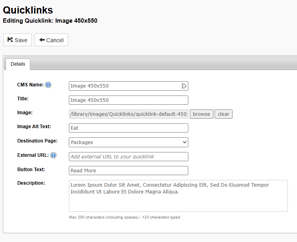
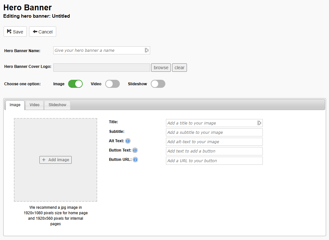
When you are working with the Highlights, Quicklinks, Hero Banners or General Page Content, you will need to complete image fields and will select Browse to open File Manager and select an image.
-
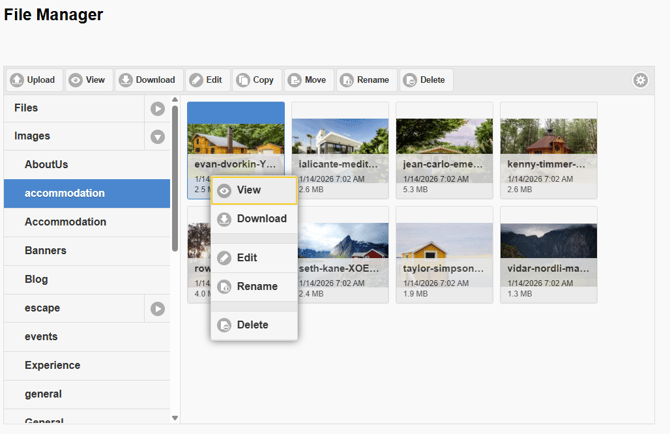
When you select Browse or + Add Image within these modules, File Manager will display over the content you are working on. Navigate to a Master Folder (Files, Images) or Subfolder to select an image until it is highlighted blue. Now select View at the top of the window.
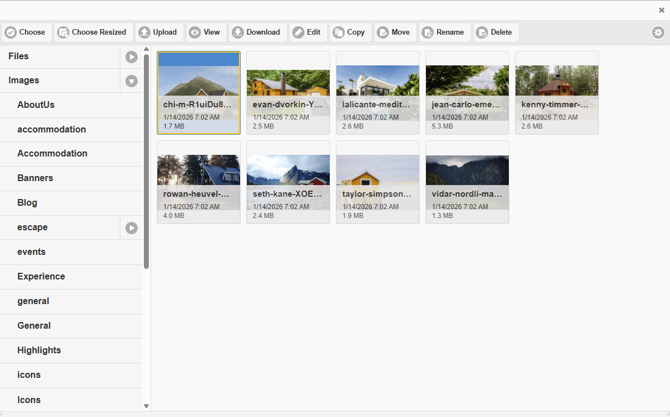
- This will open the image in full screen, and displays navigation arrows that will allow you to click through all images within this Master Folder of Subfolder.
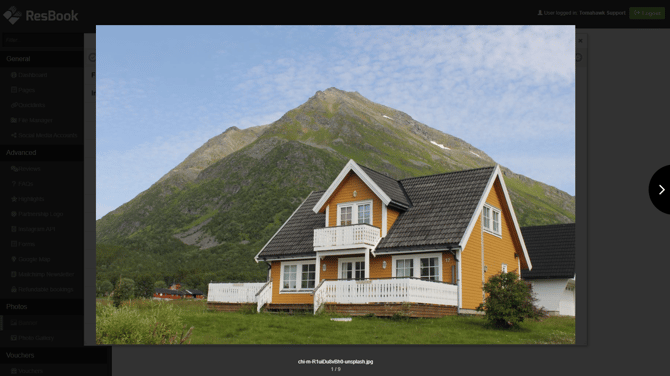
- To exit out of Full Screen mode, simply click anywhere on the page.
Download an image from File Manager
-
Login to the CMS using your Username and Password, the navigate to the General section of the CMS, then select File Manager.
- Navigate to a Master Folder (Files, Images) or Subfolder to select an image until it is highlighted blue. Now select Download at the top of the window.
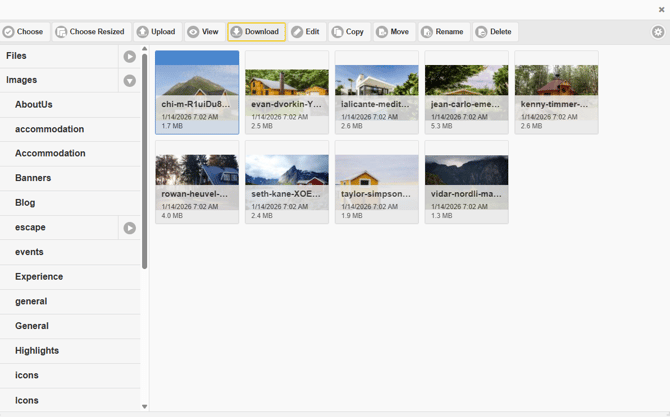
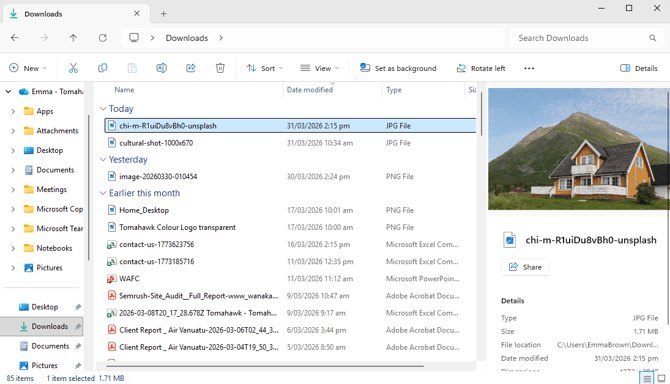
- If you have the download icon in your browser, the file will automatically save here for you to open and view the file. You can also open File Explorer and select the Downloads folder to view the file.
- You are now able to move, rename, and save the file for use outside of the CMS.
Edit an image within File Manager
Read our step-by-step guide on How to edit an image within File Manager that covers
How to resize an image, How to crop an image, What is Aspect Ratio, How to rotate an image, How to adjust an image (with preset options for brightness, contrast, saturation, exposure, sepia, sharpen), and How to apply a preset (with preset options clarity, her majesty, nostalgia, pinhole, sunrise, vintage).
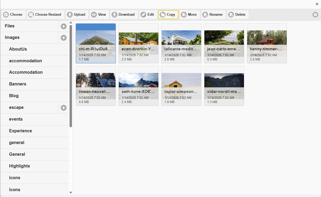
Copying Files from one Folder to another Folder within File Manager
-
Login to the CMS using your Username and Password, the navigate to the General section of the CMS, then select File Manager.
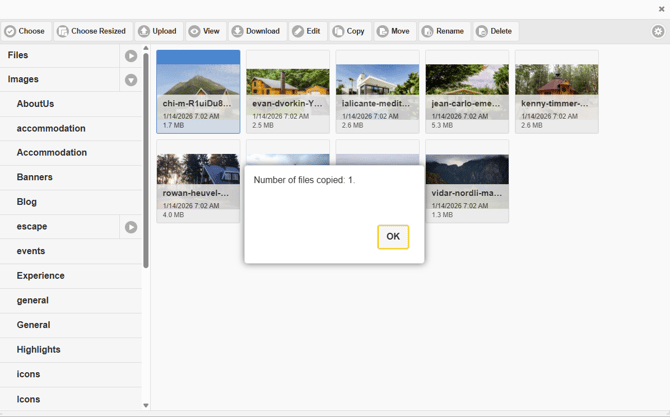
- Navigate to a Master Folder (Files, Images) or Subfolder to select an image until it is highlighted blue. Now select Copy at the top of the window.
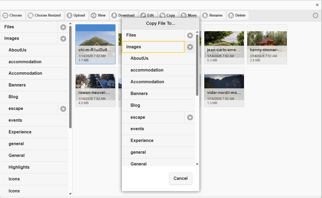
- You will be presented with a pop-up window with a list of the Master Folders (Files, Images) and Subfolders where you can select where you would like to file a copy of the image to. In this example the image we are making a copy of is located within the Images (Master folder) > accommodation (Subfolder), and we are going to save a copy of the first image to the Images (Master folder) > Highlights (Subfolder).
- Once you select the Master folder or Subfolder, File Manager will make a copy of the image with the same file name and save it to this Master folder or Subfolder. You will now see a pop-up to confirm that the copy has been made, and you can now click OK.
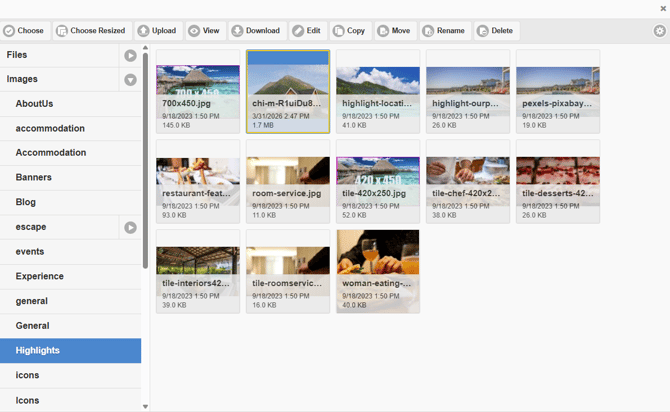
- We can now navigate to the Images (Master folder) > Highlights (Subfolder) where you will see the copy of the file.
- This is a great option to use if you want to make edits to an image, and not change the original image, or make changes to an image that is used across content items (Hero Banner, Highlight, Quicklink, etc).
Moving Files to another Folder within File Manager
-
Login to the CMS using your Username and Password, the navigate to the General section of the CMS, then select File Manager.
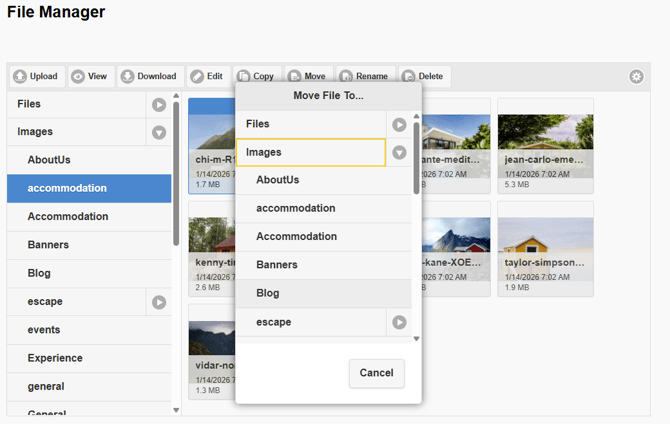
- Navigate to a Master Folder (Files, Images) or Subfolder to select an image that you would like to move from its current location, to a new location until it is highlighted blue. Now select Move at the top of the window.
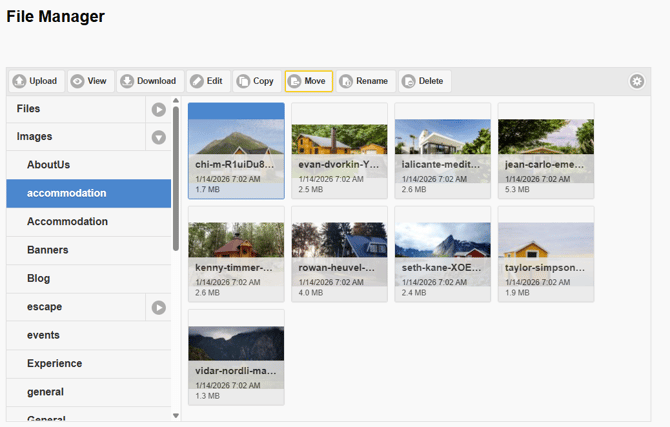
- You will be presented with a pop-up window with a list of the Master Folders (Files, Images) and Subfolders where you can select where you would move your selected image to. In this example the image we are moving is located within the Images (Master folder) > accommodation (Subfolder), and we are going to move this image into the Image (Master folder) > Blog (Subfolder).
- Once you select the Master folder or Subfolder, File Manager will remove the image from its current location and file this in the new location you have selected. You will now see a pop-up to confirm that the copy has been made, and you can now click OK.
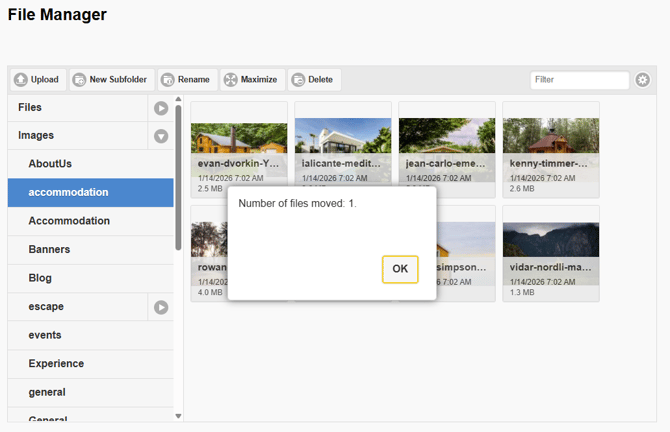
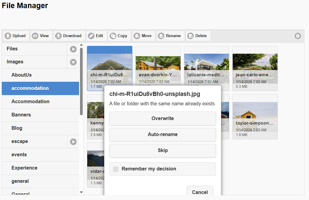
- In the event that you are trying to move a file from one location to another location, and there is a file with the same name in this new location, you will see a pop-up window asking if you wish to replace and Overwrite the file, automatically generate a new name or Auto-rename the file (which will add (1) to the end of the file name, or you have the option to abandon this action and Skip moving the file to a new location.
- You will now see a pop-up to confirm that the copy has been made, and you can now click OK.
- We will see that the file is no longer saved within the Images (Master folder) > accommodation (Subfolder). We can now navigate to the Images (Master folder) > Blogs (Subfolder) where you will see the new location of the file.
- It is important to note that when you move an image from its original location to a new location, you have created a new path from the image in File Manager to the content item. Similar to a URL, this means that content item (Hero Banner, Highlight, Quicklink, etc) that is displaying on the front end will show with a broken image as you have changed the original pathway from where the image was originally saved within File Manager to a new Folder and Subfolder.
Renaming Folders and Files
Some of the most Common Problems with images that we see is when a Master Folder, Subfolder or file have been renamed, and best practice has not been observed. Your Netzone CMS needs to observe the following naming conventions:
- Naming and renaming File Manager images and folders: Please do not use spaces or special characters in the name. Hyphens are good to use instead of spaces e.g.: Instead of Highlights & Quicklinks.jpg use HighlightsandQuicklinks.jpg or Highlights-and-Quicklinks.jpg
- Naming and renaming file types: You are able to rename image files to change the file type. As File Manager prefers .jpg files and not .jpeg files, you are able to rename a file and update this from .jpeg to .jpg
-
Login to the CMS using your Username and Password, the navigate to the General section of the CMS, then select File Manager.
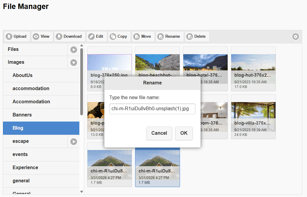
- Navigate to a Master Folder (Files, Images) or Subfolder to select an image that you would like to rename until it is highlighted blue. You can select Rename at the top of the window, or right click and select the Rename option.
- You will be presented with a pop-up window where you can edit the file name.
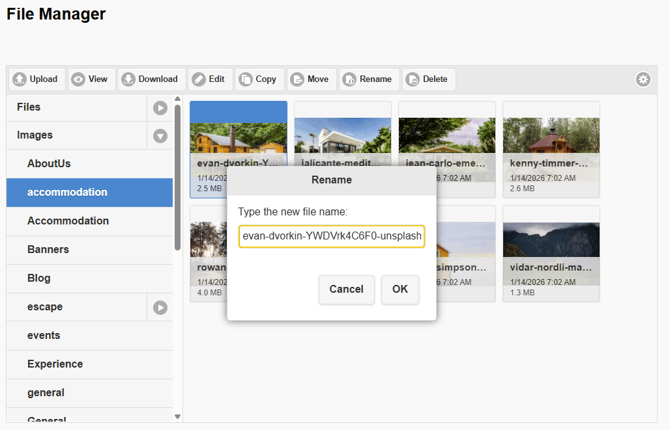
- Make sure that if you are highlighting the file name to replace it, that you retain the .jpg (file type), otherwise you will get an error message to let you know that you may have forgotten the full stop, or .jpg


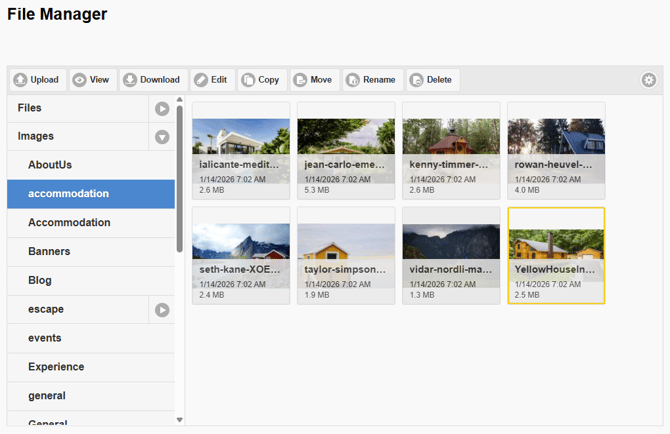
- Once you are ready to save you changes, select OK an you will be taken back to the subfolder, with your renamed image highlighted in yellow, and reflecting your changes.
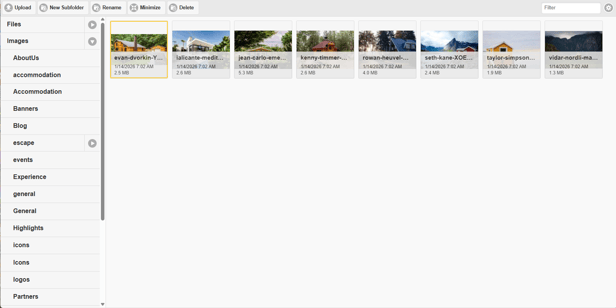
Maximise your view of File Manager
-
Login to the CMS using your Username and Password, the navigate to the General section of the CMS, then select File Manager.
- By selecting Maximise at the top of the window, this will open File Manager to view in full screen, so the CMS menu will disappear allowing you to view more files within each Master folder and Subfolder without the need to scroll.
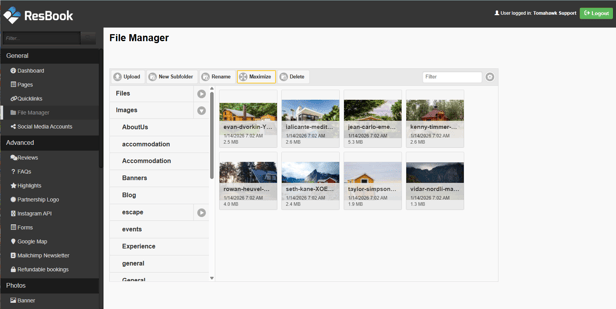
- To exit full screen, select the Minimize button.
Locate files using the Filter option
File Manager has a filter option that allows you to locate a file by file name within a single Master Folder or Subfolder. This tool is limited to within a folder only, and is not a global option to search within all folders.
-
Login to the CMS using your Username and Password, the navigate to the General section of the CMS, then select File Manager.
- Navigate to a single Master Folder (Files, Images) or Subfolder, then enter text within the filter field. File Manager will display any files that match the text entered.
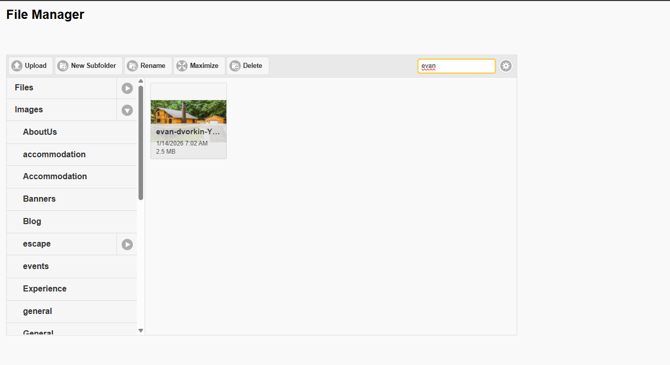
- To return to a list of all files within this folder, simply delete the text in the filter field.
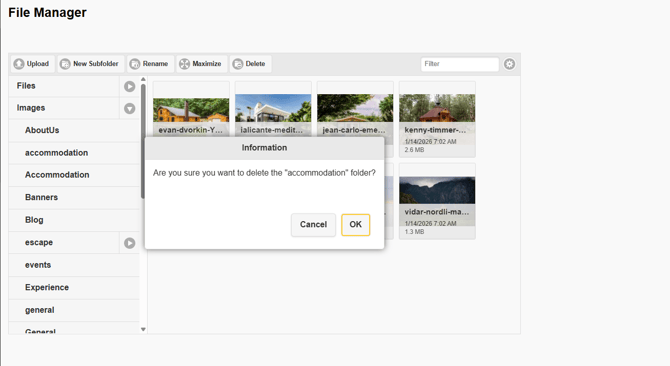
Deleting a file or folder
When working within a folder, the golden rule is that you must select a file within a folder, so that it is highlighted blue, before selecting OK to confirm your deletion.
This will help you to avoid accidentally deleting an entire folder of images instead of a single image within a folder.
Once a file or folder has been deleted, it is not recoverable.
Pay close attention to text that displays within the pop-up window to confirm your deletion ahead of selecting OK, as this will let you know if it is a single image or a folder that has been selected to be deleted.
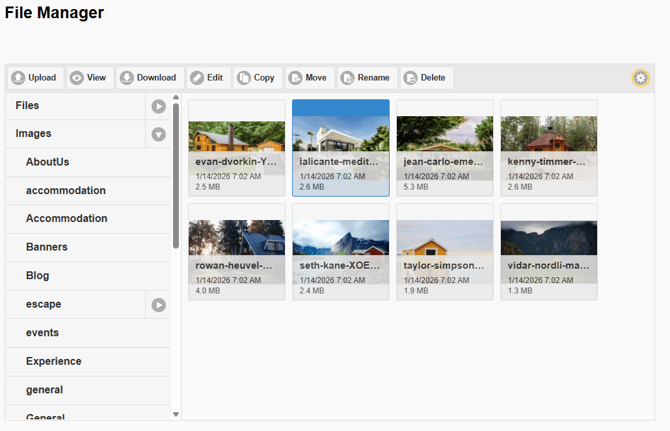
❌ A folder or image has not been selected (highlighted in blue)
✅ A file within a folder has been correctly selected (highlighted in blue)
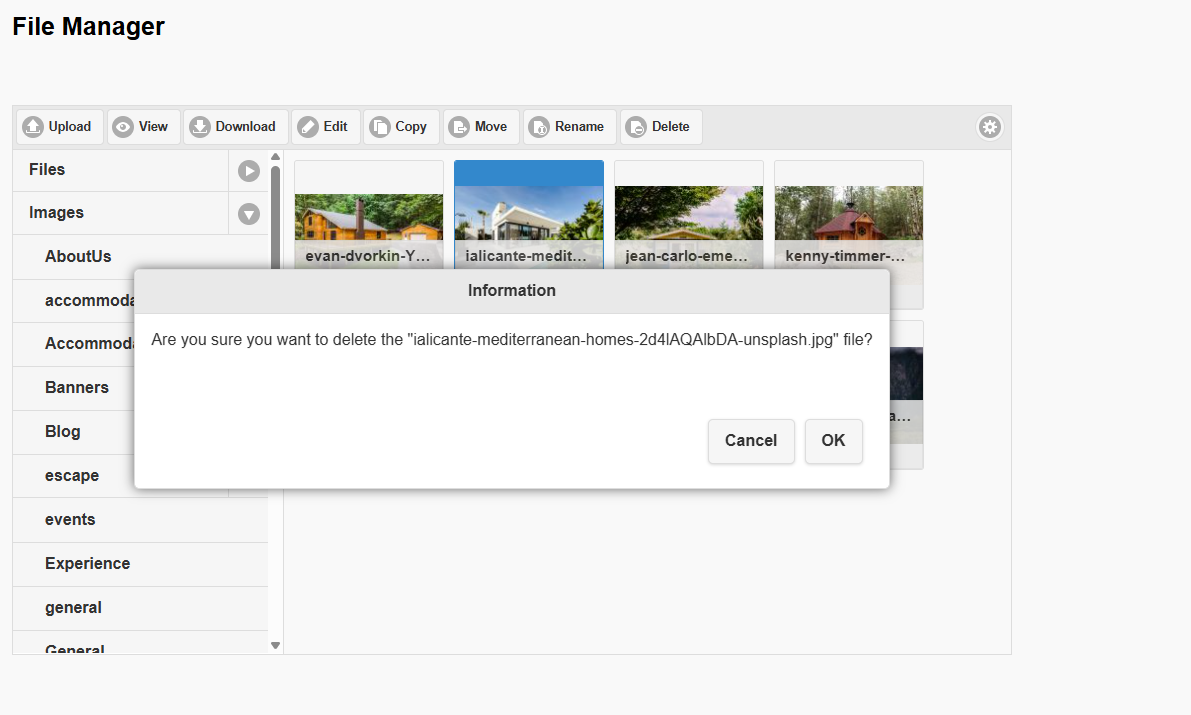
- Navigate to the Subfolder or image that you would like to delete until it is highlighted blue. You can select Delete at the top of the window, or right click on the Subfolder or image and select the Delete option.
- You will be presented with a pop-up window with text for you to review to confirm if it is a folder or image that you wish to delete.
- If you are ready to confirm this deletion, select OK an you will be taken back to the subfolder, with your changes saved.
Customise your view
Let's look at the settings available within File Manager to help you create a view to easily find the files you're looking for. You can select multiple options to apply to customise your view of how files display.
-
Select a folder you'd like to work with, then select the cog icon on the right-hand side of the window to display a set of drop-down options to customise your view of how the files will display.
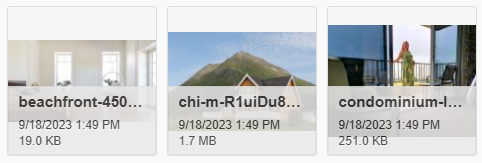
- By default the images will display with the File Name, Date (uploaded to File Manager), and File Size selected to display.
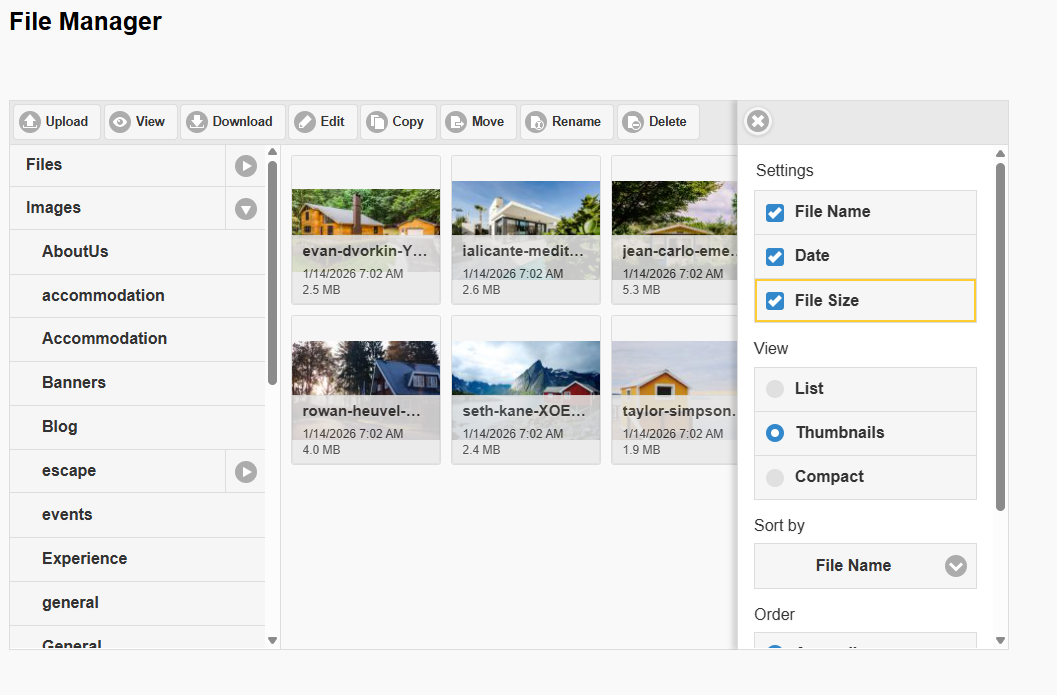
- In the list below you have the following options to display each file setting on a file:
- File Name (Settings): Select this checkbox to display the file name of the media file on the file.
- Date (Settings): Select this checkbox to display the date and time that the media file was uploaded to File Manager, on the file.
- File Size (Settings): Select this checkbox to display the file size of the media file on the file e.g.: 2.5 MB
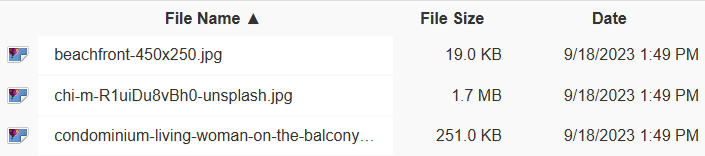
- List (View): Select this checkbox to display files within each folder and subfolder as a single column list view, so that the file name is highlighted.
- Thumbnails (View): Select this checkbox to display files within each folder and subfolder as a thumbnail view, so that the file content is highlighted.
- Compact (View): Select this checkbox to display files within each folder and subfolder in a multiple column list view, so that all files can be reviewed by their file name.

- File Name (Sort by): Select one option from this drop-down menu to sort the media files within each folder and subfolder to display in ascending order of either File Name (A-Z), File Size (smallest to largest) or Date (newest to oldest).
- Ascending / Descending (Order): Toggle between the options of ordering media files within each folder and subfolder to display in ascending or descending order. A great option if you have previously selected File Name (Sort by), where all files will display from A-Z by default, then display by Descending order.
- Thumbnail Size: Toggle the slider to set the thumbnail size to better view content from 150 – 496 pixels. This option is only available when the Thumbnails (View) has been selected.
💡Things to Remember:
-
Editing an image: If you are renaming a subfolder that contains images that have been selected to display on a page, you will need to re-select the images to display on the page as in renaming the page you have broken the connection or pathway to this image.
-
Moving Images: When you move an image from its original location to a different Master Folder or subfolder, you have created a new path to the image in File Manager. Similar to a URL, this means that content item (Hero Banner, Highlight, Quicklink, etc.) that is displaying on the front end the image will show with a broken image as you have changed the original pathway from where the image was originally uploaded within File Manager to a new Folder and Subfolder.
- Deleting a file or folder: The golden rule is that you must select a file within a folder, or a folder so that it is highlighted blue, before selecting OK to confirm your deletion. This will help you to avoid accidentally deleting an entire folder of images instead of a single image. Once a file or folder has been deleted, it is not recoverable.