
Here are some tips to help you troubleshoot common problems with images:
-
An image is not showing on the front end: Check the File Name
-
An image is not showing on the front end: Check the File Type
- An image looks stretched (for websites prior to 2019)
- An image looks stretched in a Hero Banner (for websites after 2024)
An image will not upload into File Manager
- This could be caused by your image being too large
Please check the file size is under 5MB before uploading your images into File Manager. You can find more details on file sizes in our Guides for optimizing images: on Windows or Mac, or How to edit an image within File Manager. - This could be caused by your file being the incorrect type
File Manager prefers image files to be in .jpg format, and for document files to be in PDF format. File Manager may allow you to upload other file types such as .jpeg or .JPG, but they will not display on the front end of your website. You are able to rename an image with a different file type by changing the extension e.g.: From OurPool.JPG to OurPool.jpg
An image is not showing on the front end: Check the File Name
If you have successfully uploaded an image to File Manager, then selected the image to populate page content, such as the image for a Quicklink, Hero Banner, Highlight, Gallery, etc, saved your changes, but the image is not displaying, or is showing as a broken image, on the front end here are some areas within the CMS you can review.
-
Navigate to the module within the CMS that the image is pulling from (General Page content, Quicklink, Hero Banner, Highlight, Gallery, etc). In the example below we can see that the Hero Banner on the About Us page is not displaying, and is instead showing a broken image icon (
 ) so there is an issue with the Hero Banner created within the Photos Module.
-
Open the content item, and you may see that there is no longer an image displaying in the image field, meaning that there could be issues with the file being named incorrectly, so the file name may contain special characters or spaces.

-
Select + Add Image, or Browse button within the content item you are working on to take you to File Manager where you can locate the image and review the file name. Select the image you want to work with, then select Rename at the top of the page to check the file name. In this example we can see that there are spaces between the words. You can remove the spaces, or replace with hyphens, then select OK to save your changes.

-
Make sure to review on the front end that your changes have published correctly.
An image is not showing on the front end: Check the File Type
If you have successfully uploaded an image to File Manager, then selected the image to populate page content, such as the image for a Quicklink, Hero Banner, Highlight, Gallery, etc, saved your changes, but the image is not displaying, or is showing as a broken image, on the front end it may be due to an uploaded image having the incorrect file type.
File Manager prefers image files to be in .jpg format, and although File Manager may allow you to upload other file types such as .jpeg or .JPG, they will not display when selected to populate a content item on the front end of your website. You are able to rename an image with a different file type by changing the extension e.g.: From OurPool.JPG to OurPool.jpg-
The first step is to locate the content item on the front end is not displaying, then navigate to this content item within the CMS. In the example below we can see that a Highlight is showing with a broken image icon (
).
-
Navigate to the module within the CMS that the image is pulling from (General Page content, Quicklink, Hero Banner, Highlight, Gallery, etc), and select the + Add Image, or Browse button within the content item you are working on to open File Manager.

- Now locate the image, to review the file name. Select the Rename button at the top of the page to check the file name.

- In this example we can see that the file has been uploaded as a .JPG file type. File Manager prefers image files to be in .jpg format, and although you are able to upload other file types such as .jpeg or .JPG, when selected to display on a content item, they will not display on the front end of your website.

- You are able to rename the image with a different file type by simply changing the extension e.g.: highlight-ourpool-420x250.JPG to highlight-ourpool-420x250.jpg then select OK to save your changes.
- Make sure to review on the front end that your changes have published correctly.

An image looks stretched For websites prior to 2019 only
When you add an image into a content section of a General Page, it is very important to remove the width and height dimensions from the image, so it can resize to different screen sizes.
- Navigate to the Page within the CMS that the image has been added to. Right-click on the image to display a pop-up window, then select Image Properties.

- This will open a content box where you will see fields for the Width and Height of the image, these fields can be deleted.
An image looks stretched in a Hero Banner (for websites after 2024)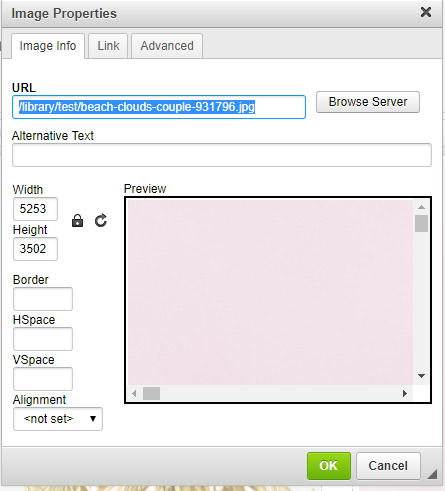

- Select OK to close the Image Properties window, then select Save at the top of the page to save your changes to the page.
- Make sure to review the image on the front end to see how the image is now displaying.
An image looks stretched in a Hero Banner (for websites after 2024)
Hero Banners on the Home Page, and Hero Banners used on Internal Pages, each prefer an image with different pixel dimensions:
Home Page: We recommend a .jpg image of 1920 pixels wide x 1080 pixels high
Internal Pages: We recommend a .jpg image 1920 pixels wide x 560 pixels high
Let's work with a landscape image for the Hero Banner on the Home Page to understand the importance of using an image that is the correct dimensions for this placement.
Firstly, let's work with an image we want to use for this placement, and find the dimensions of this image. You can read more about finding the dimensions of an image in our Guide on How to edit an image within File Manager within the section on Aspect Ratio.
We can see that the dimensions of this image are 4,272 pixels wide, by 2,848 pixels high, so we are working with a large image.


Although this is a large image, the dimensions are too narrow for the Hero Banner on the Home Page.

This means that when selecting this image to use in a Hero Banner, the CMS will stretch the image to fit the width of the Hero Banner, and centre the image, meaning that the parts of the image will be cut off.

You are able to resize or crop an image within the CMS, and see what the image will look like before you finalise an edit within File Manager. You can learn more about this in our Guide on How to edit an image within File Manager within the section on How to crop and image and How to resize an image.


The best way to maintain control over an image is to create a template using a platform such as Canva set to the pixel height and width of either a Home Page Hero Banner or an Internal Page Hero Banner. This way you are able to resize and centre an image based on the the content within the image, then save and download the image, ready to upload into File Manager.
