Using MailChimp With ResBook PMS
ResBook has the ability to connect to MailChimp and create campaigns for your property.
If you are interested in MailChimp but don't have an account yet, click Here to create an account.
Connect ResBook PMS to MailChimp
- To connect your MailChimp to ResBook PMS, go to Settings > System Settings > MailChimp. Then click on the [Connect to MailChimp] button.
- You will then be redirected to a login screen where you will need to enter your MailChimp log-in details.
- Once you have entered your log-in details, you will be redirected to MailChimp, at which point you will now be connected.
Create a Campaign in ResBook PMS for MailChimp
Now you are ready to create a campaign in ResBook PMS for MailChimp. Here are the steps to create one:
- In Mailchimp create a template, create the header, footer and add the text: ^^placeholder^^ and save it
- Go into Settings > System Settings > MailChimp. There are three options listed on this page that you need to complete before continuing. Here you can add a newsletter subscription option to your booking page, choose the list you want to add guests too, and choose whether or not to automatically send guests from the CRM to MailChimp.

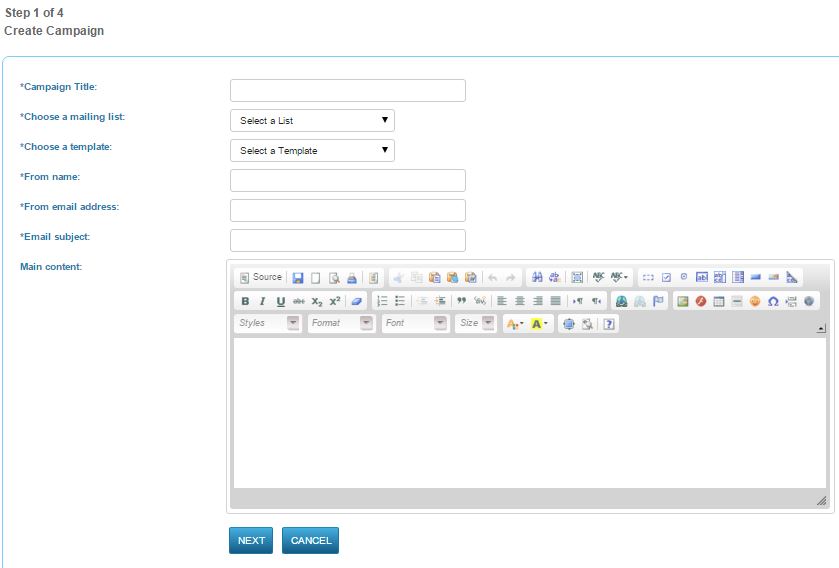
- Click on [Create Campaign]
- You can customise your campaign by adding a Title, choosing a Mailing List, choosing a Template (this will have to be previously created in Mailchimp), your email 'From Name', your 'From Email Address' (has to be same as the verified email in your mailchimp account), your Email Subject, and then your Main Content.
 Add the text: ^^placeholder^^ to the body of the template that you wish to use from Mailchimp. The campaign cannot be sent to MailChimp unless this is done.
 - Click [Next] once you have finished.
- Now you choose the stock units you wish to feature in the new campaign. Select the relevant stock units to feature by ticking the boxes to pull across the following information from the stock unit settings
- the name,
- bed, bath and guest numbers
- all images
- email content (with formatting)
- link to webpage
- address lines 1,2 and town
- Click [Next].
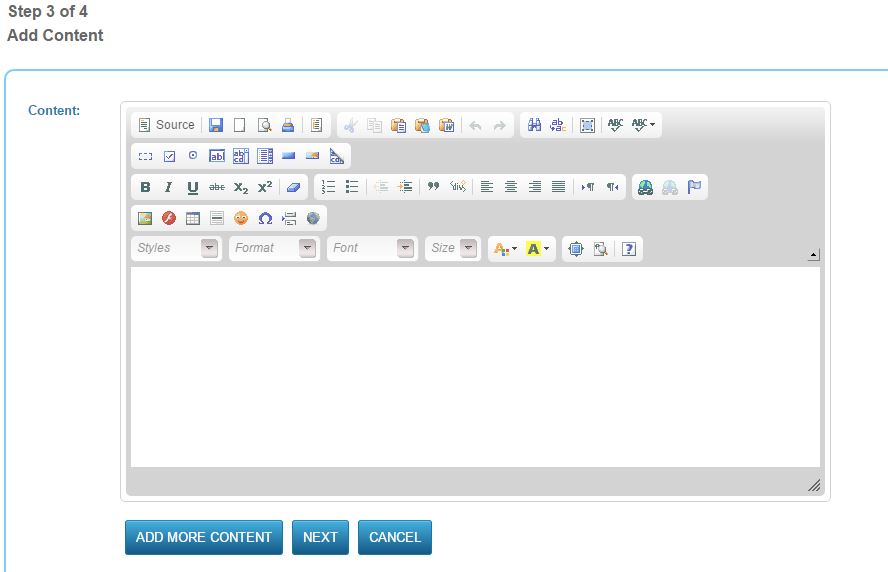
- Step 3 will allow you to add additional content (sub articles) to your campaign in addition to your main content. Just add content into the text box on the page and then click [Next] once finished.

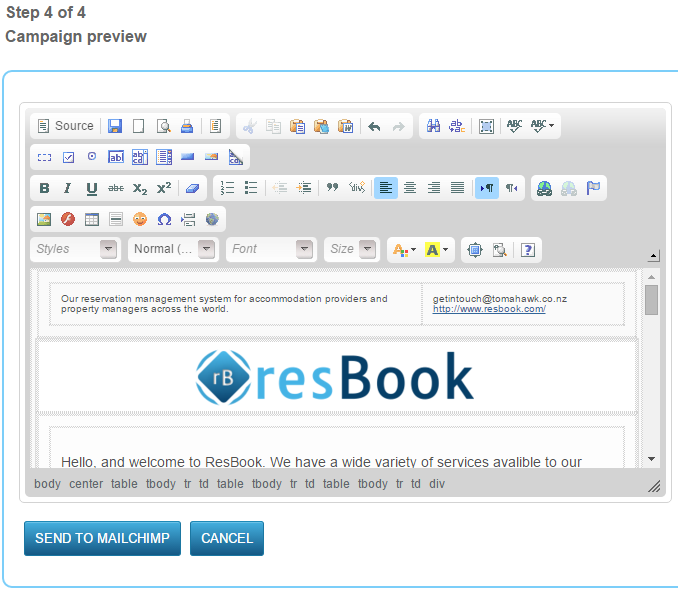
- You can now get a preview of your campaign to look over and edit before you send it off to MailChimp. Here you can make sure that your campaign looks how you want it to, before it gets sent to your subscribers and your guest list. If you wish to edit the design elements of the featured properties like change the default font or images, you can do it at this stage.

- Once finished, click [Send to MailChimp]. A small confirmation box will appear at the top of your screen to confirm that your campaign has been sent to MailChimp. Log-in to MailChimp and you will see your new campaign there under 'Campaigns'. You can edit or send the campaign from here.

