Setup Wizard (9) | Room Types
In this section, you can create Room Types for your property.
- Firstly, select [Create a new Room Type].

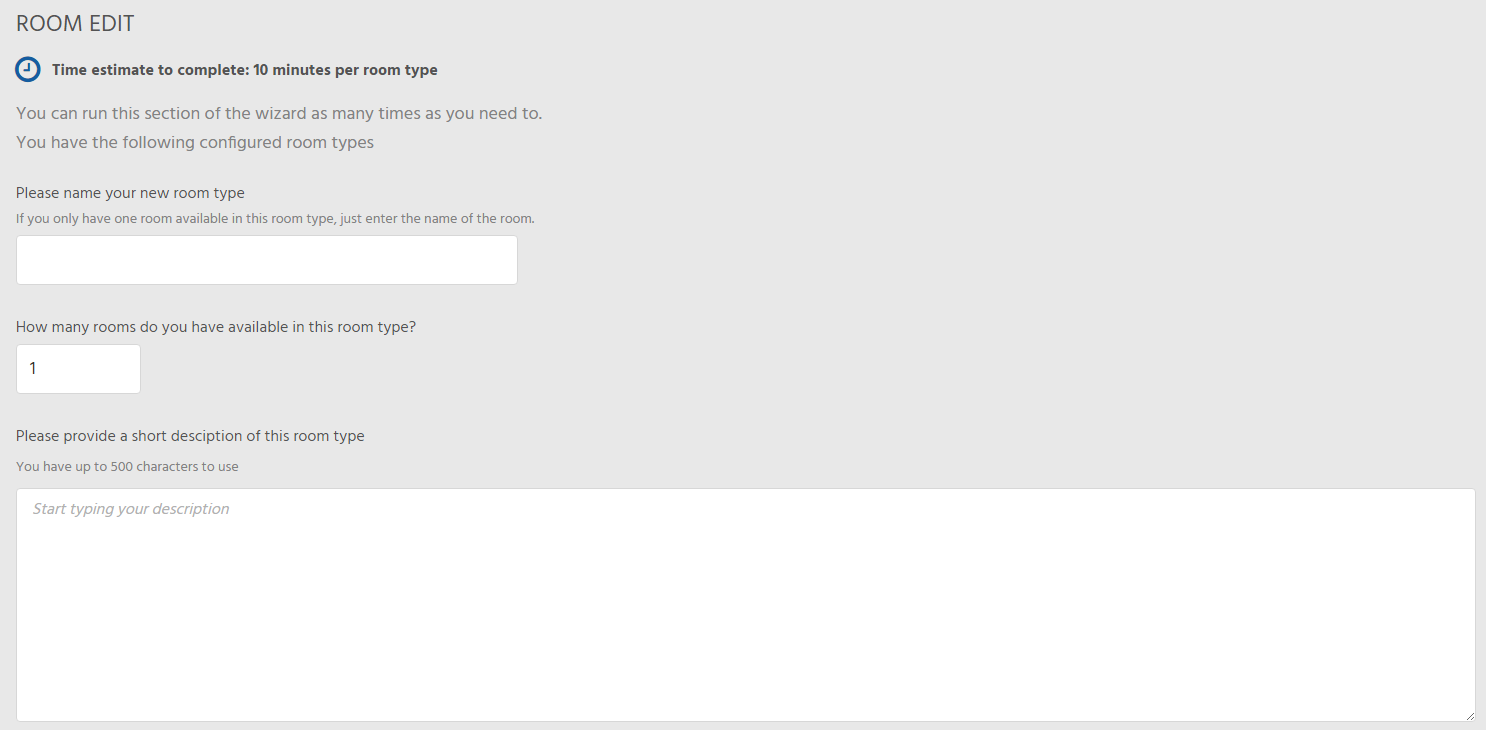
- Start by entering the name of the new room type, how many rooms you have available in this room type, and then provide a short description of the room type (up to 500 characters).

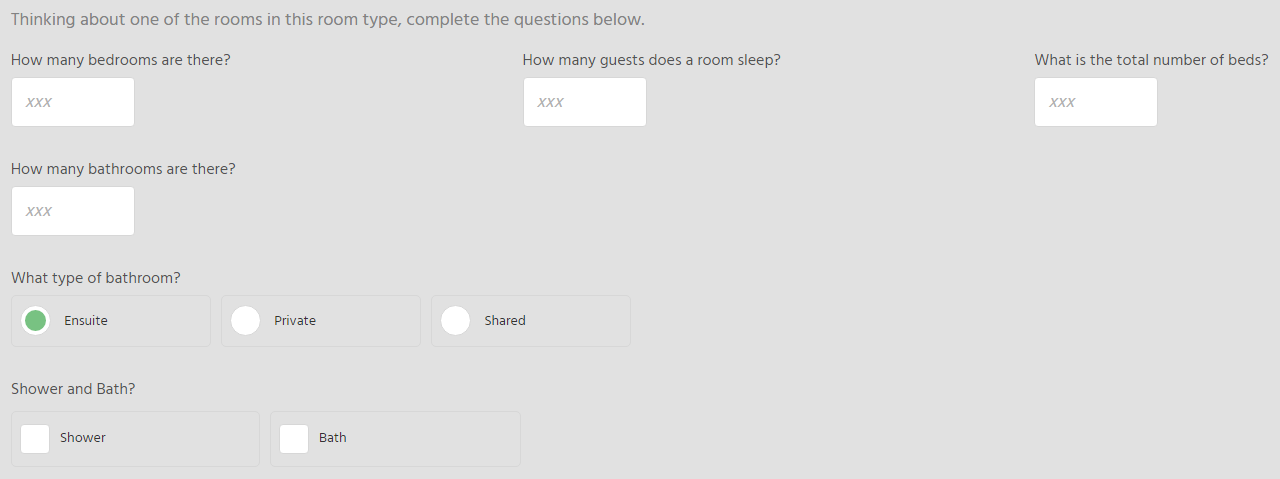
- Next, you need to complete the questions listed on the screen relating to the room type. This includes how many bedrooms there are, how many guests in a room, the total number of beds, the number of bathrooms, the type of bathroom, and if the bathroom has a shower and/or bath.

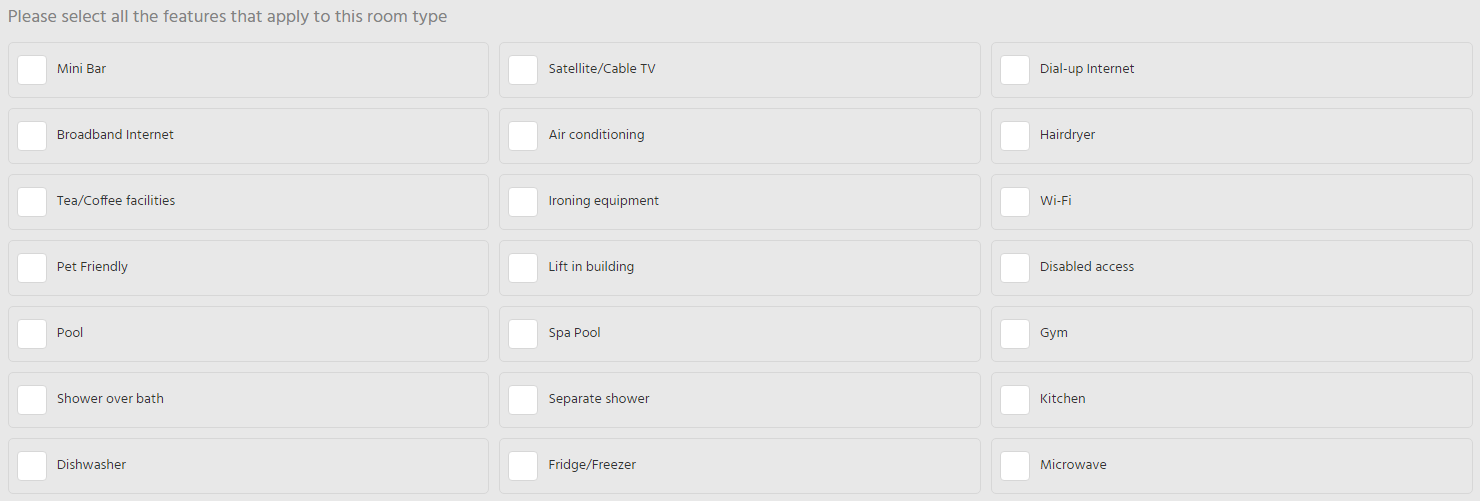
- After filling out the answer to those questions, scroll down and select the features that the room type offers. You can select as many features as you want that apply to the room type you are creating.

- After filling out the features, you can now name each of the individual rooms and set their booking status. The number of rooms that appear here is dependent on how many available rooms of this type you entered earlier. For each of the rooms, enter the name you want. Then decide if you want to publish the room, or keep it hidden. Finally, you can select if you want to make the room Active or Inactive.

- Published = Visible to guests on your booking engine. It can be booked.
- Hidden = Hidden from your booking engine. Guests cannot see these rooms or book them.
- Active = You can see the room on your back office calendar.
- Inactive = The room is not shown on your back office calendar.
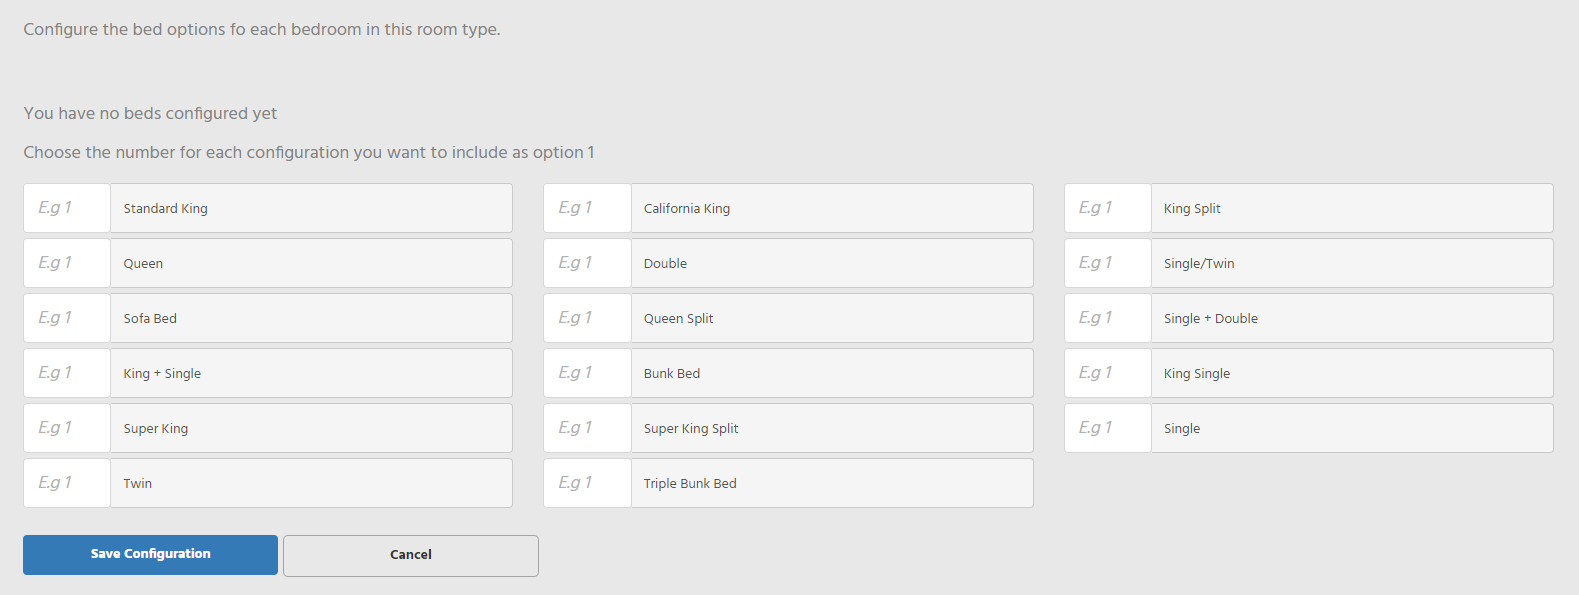
- Next is the Bed Configurations for this room type. Click on [Add Configuration], and a list of all the bed configurations will appear. Choose the bed configurations you wish to apply to the room type, then click [Save Configuration].

- It will then be listed on the screen. You can then add, change or delete bed configurations if you wish.

- Lastly, you can upload images for the room type. A maximum of 10 images can be uploaded, with a maximum file size per photo no larger than 1MB. Only JPG, PNG and TIF files are accepted. The recommended size for each photo is:
- Horizontal – max-width 1200px, saved for web, and optimised
- Vertical – max-width 900px, saved for web, and optimised
- The width and height may not exceed 1500 pixels.

- Once you have finished uploading photos, click on [Save Room Type]. Your new Room type will now be listed on the screen, to which you will now be able to create a new room type or edit an existing one.

Note: The Onboarding wizard will create a single stock unit for any Room Type with the number of rooms set to 1. If the number of rooms exceeds 1, it will assume you are creating multiple of the same "Room type" and thus the Setup Wizard will create multiple stock units under a classification automatically for you.
Once done, the next step is Room Linking.
