Setting Up Email Templates
You are able to customize each of your emails using Email Templates. This allows you to personalize in your words email interactions with your guests. The Email Template Theme is equivalent your personalized stationery in electronic form.
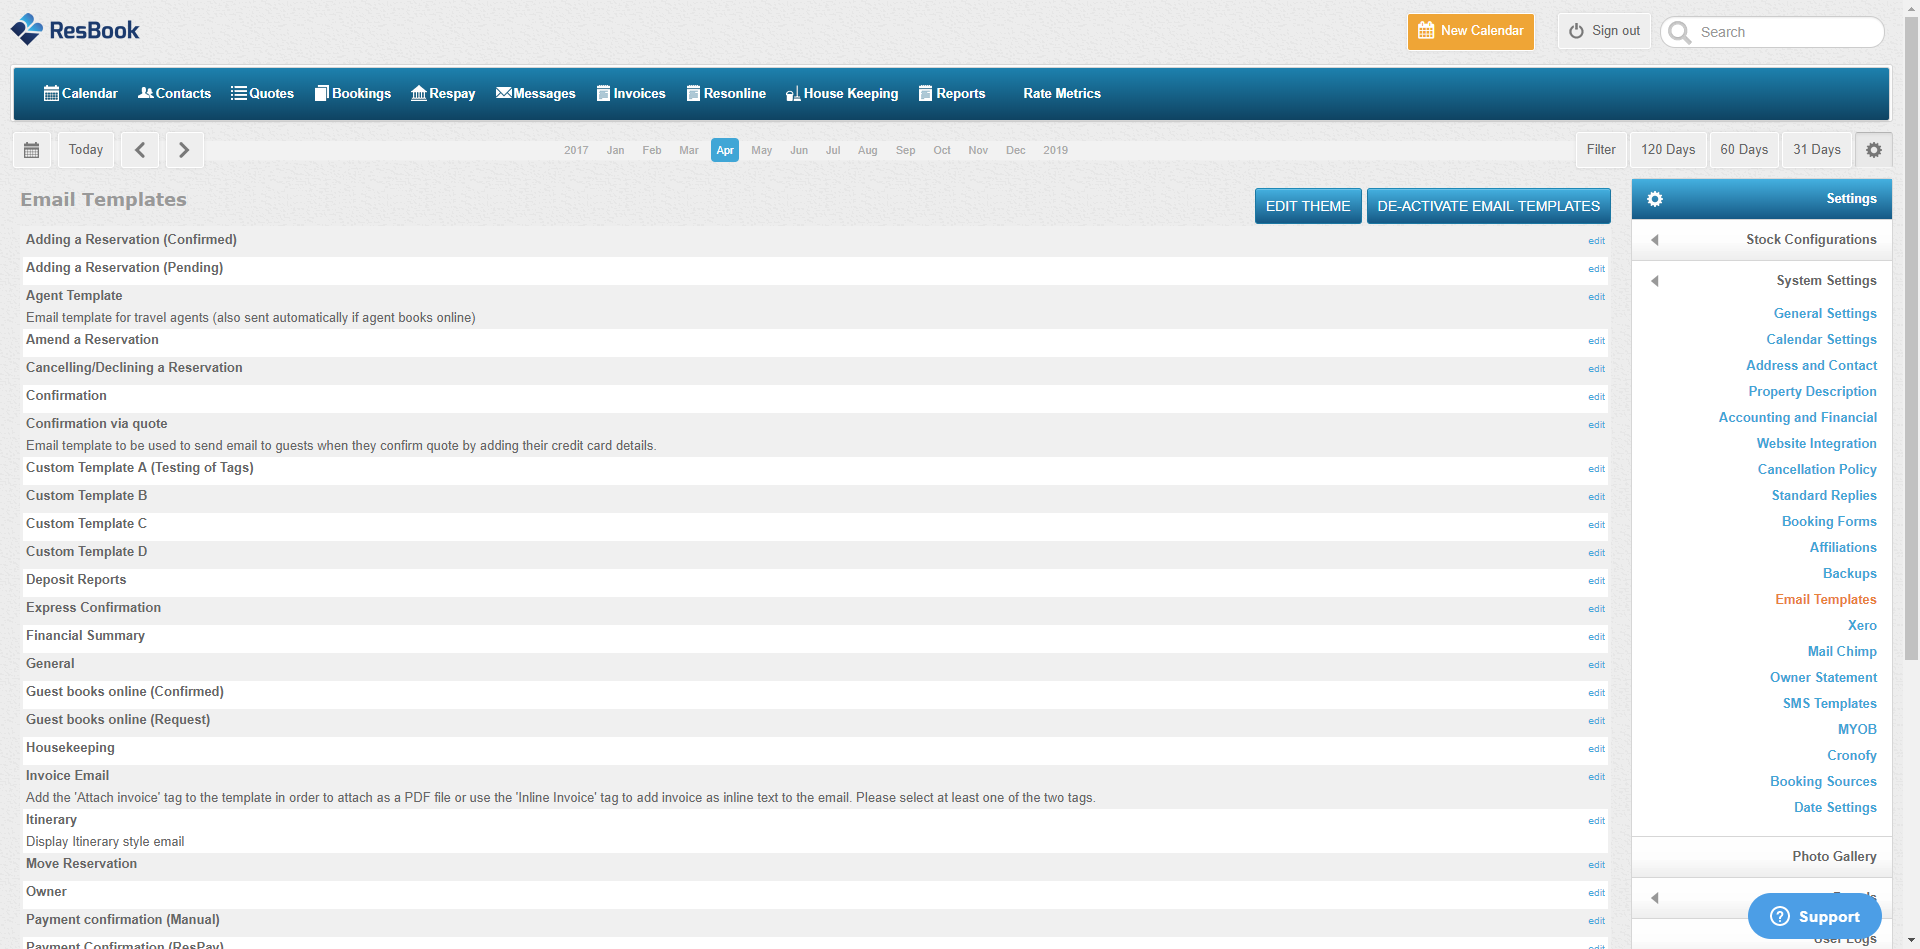
Click on Settings > System Settings > E-mail Templates.
There are 3 components to these e-mail templates. These are summed up in 3 easy steps:
1. Setting up your e-mail replies and including the appropriate tags
2. Editing the Theme (letterhead)
3. Activating e-mail templates
Step 1: Setting Up E-mail Templates
Select a template to work on by clicking on 'edit'.
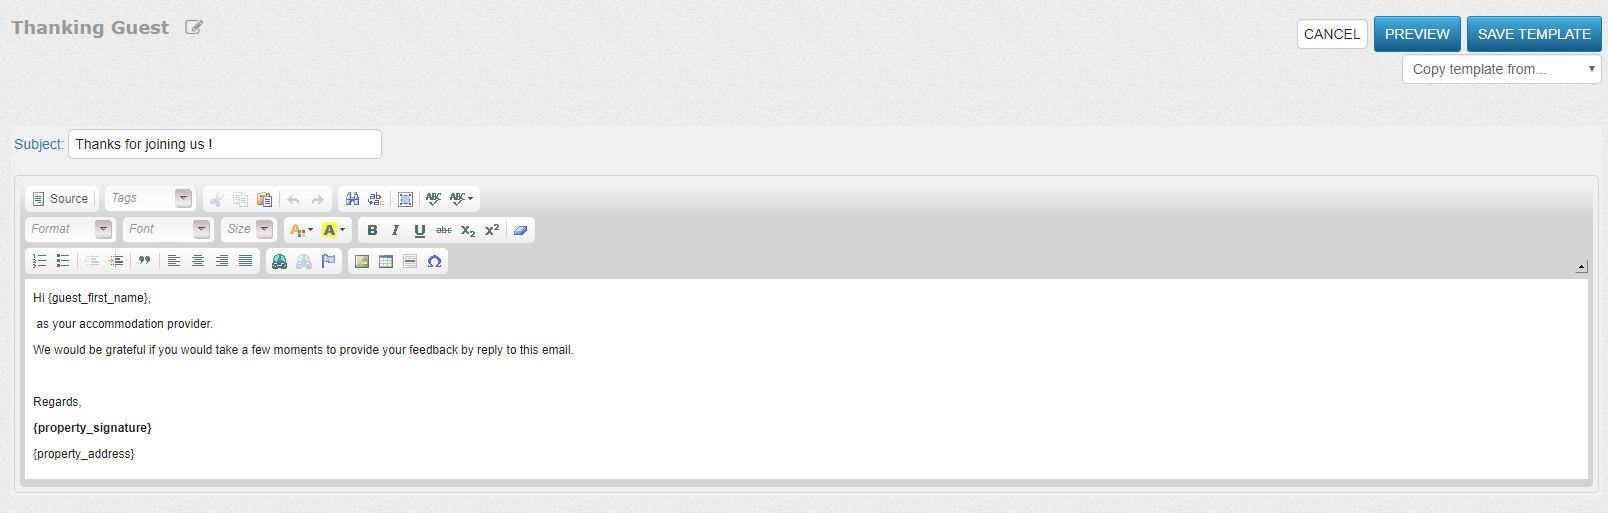
- Add in the Subject line
- Start typing up your reply and insert tags relevant to the e-mail template
- Preview it - once you are happy with this, save it.
- Move onto another template. ‘Copy template from’ means that these e-mail replies can be reused again for another template.
Tags that are inserted into the e-mail templates do require spacing between words or between paragraphs. Examples are shown in the image above…
- Gap between words: {guest_first_name} {guest_last_name}
- Gap between paragraphs: {booking_summary}
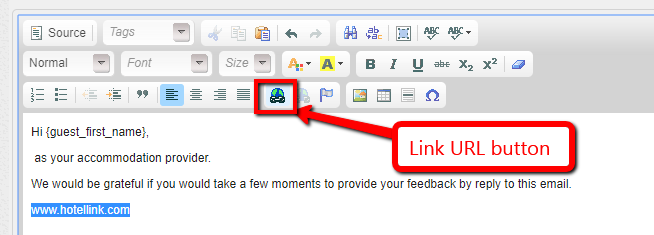
If you wish to add a URL link to the e-mail template, simply highlight the text, select the link button and enter the URL before clicking on 'Ok'.
Remember to use the 'Preview' button to display the e-mail that you have created. Please allow pop-ups in ResBook PMS for previewing.
Step 2: Editing The Theme
Click on Settings > System Settings > E-mail Templates > Edit Theme.

In this section, you can select the colors of the e-mails and choose your logo alignment in your e-mails.
a) If you want the logo to show in ResBook PMS (provided that you have added the logo in the 'Photo Gallery' of ResBook PMS), choose the Logo alignment by clicking on the drop-down box.
b) Click on the white square, use the mouse and click on the color of your preference within the colored square. Or if you know what the Hex code values are, you may insert this in. Click OK.
c) The changes can be seen on the previewing page.
d) Click 'Save' at the top of the screen if you are happy.
e) Header content and Footer content words are displayed by default for every e-mail template. To edit/remove these details, hover over and click on 'Edit'. Edit/remove the text in this box and click on 'Save'. The Footer is the perfect place to include your address details.
f) Switch e-mail templates by clicking on the drop-down box stating: 'Example Content'/ Then, hover over the 'content' words and click on 'edit'.
Remember to save your work once you are satisfied.
Step 3: Activating E-mail Templates
Once you have completed every single e-mail template, hit the 'Activate e-mail templates' button in the top right-hand corner.

This would activate all automated e-mails when online bookings are made. You will also have the ability to send the e-mails out to customers in the ResBook PMS calendar.
To ensure that all your e-mails are working smoothly, we recommend that you make test bookings in your ResBook PMS to see how customers would receive your e-mail replies.
