Once you have completed Setup, head over to Yearly Deals. Select the drop down box, choose one of your Room Types (do not select a channel).
A calendar should appear with 5 Tabs at the top; Availability, Rates, Stop Sell, Min Nights & Inclusions. This will always be set on Availability when you first open it.
All of the data that has been entered during the Setup process should have been entered in automatically to your calendar. Select each tab and ensure that the data has migrated correctly.
See below for an example of ‘Availability’:
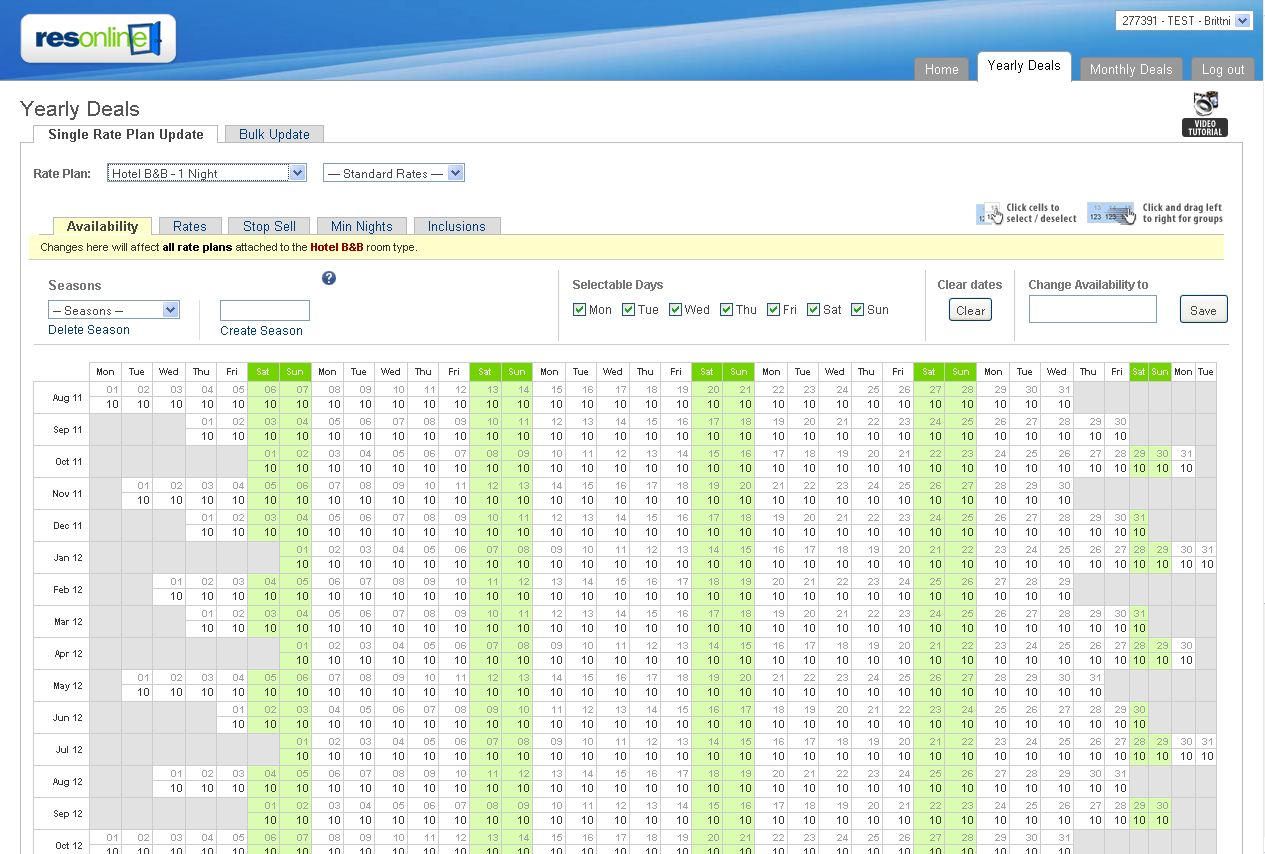
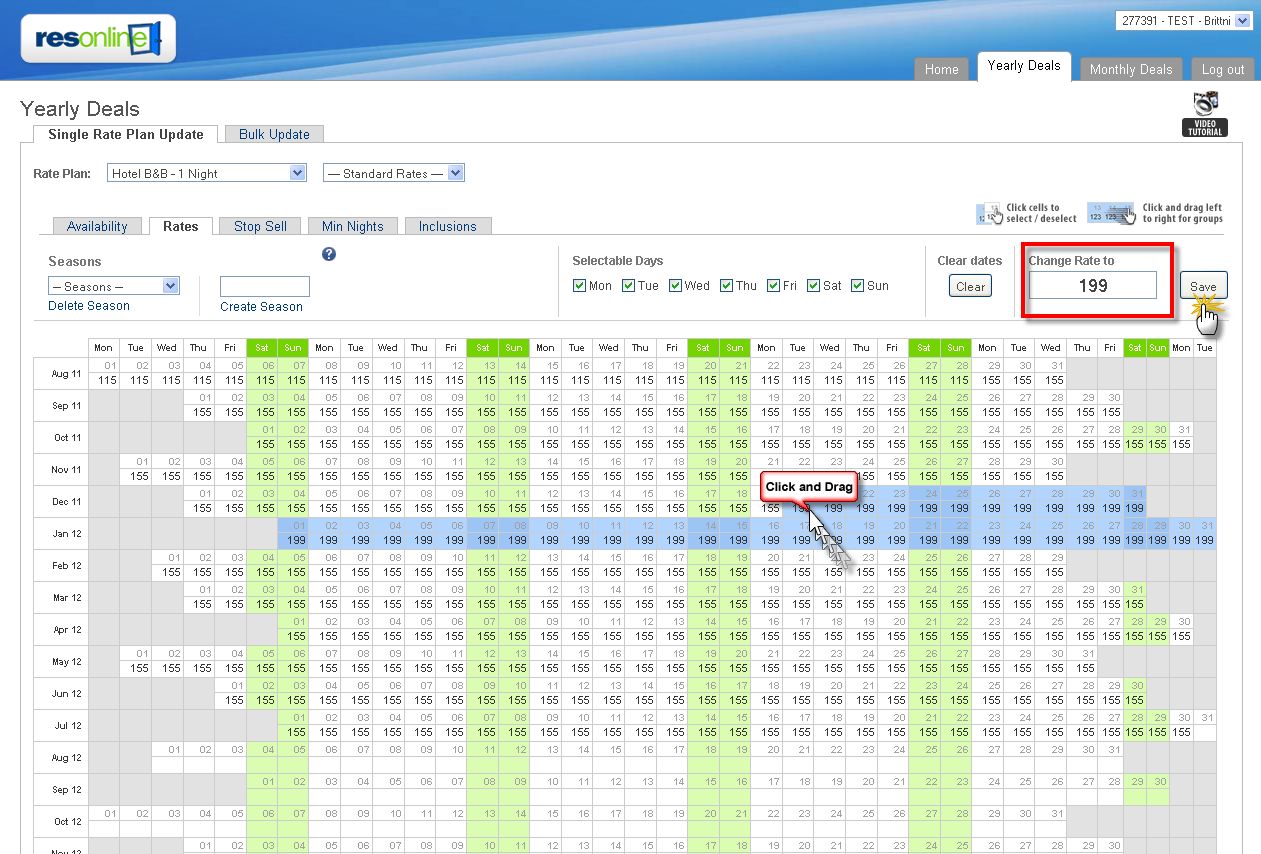
From here you can change Availability, Rates and Minimum Nights, as well as add or remove Stop Sells and Inclusions. To do this, select the corresponding tab (e.g. Rates), click on a specific date to select, or click and drag to select an entire date range. Your selection will appear in Blue.
To change the rate for your selected dates, enter the new rate into the ‘Change Rate To’ field and click Save.
Your selection will have updated to your new rate, which was $199 in the example above.
To clear your selection, click on [Clear] button in Clear Dates.
Bulk Update
Instead of manually handling or changing your individual rate packages, a bulk update can be used to update all rate packages.
- From the drop-down menu, select what you would like to update (whether it be Availability, Rates etc.)
- Select a room type.
- Select Dates.
- Select Method – (Set To, Increase By, Decrease By).
- Input Number and Save the changes.
Be careful when you do a bulk update, or you may accidentally override all your information and will have to spend time correcting it.