
In this guide we will cover:
What are Blog Categories
Blog Categories allow you to create a classification or topic for Blog Posts, and then set each Blog Post with a Category within the CMS, that best describes its content. You can set a single, or multiple Categories on a Blog Post.
On the front end, Categories allow a visitor to the Page to filter Blog Posts by these Categories.
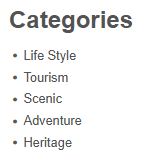
Blog Categories can be seen on a sidebar of the Blog Landing Page where visitors to the page can select a desired Category to view all related Blog Posts.


How to create a Category for a Blog
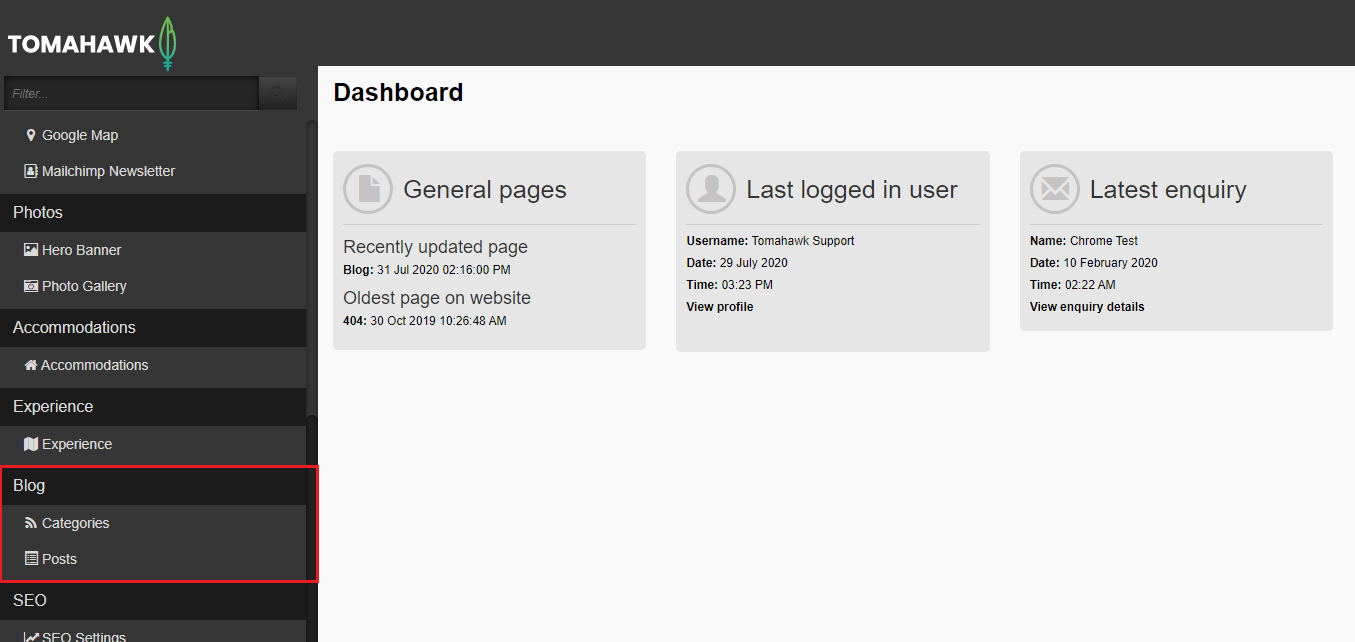
- Login to the CMS using your Username and Password, the navigate to the Blog section of the website, then select Categories.
- You'll see that there is already a list of Categories that have been created.
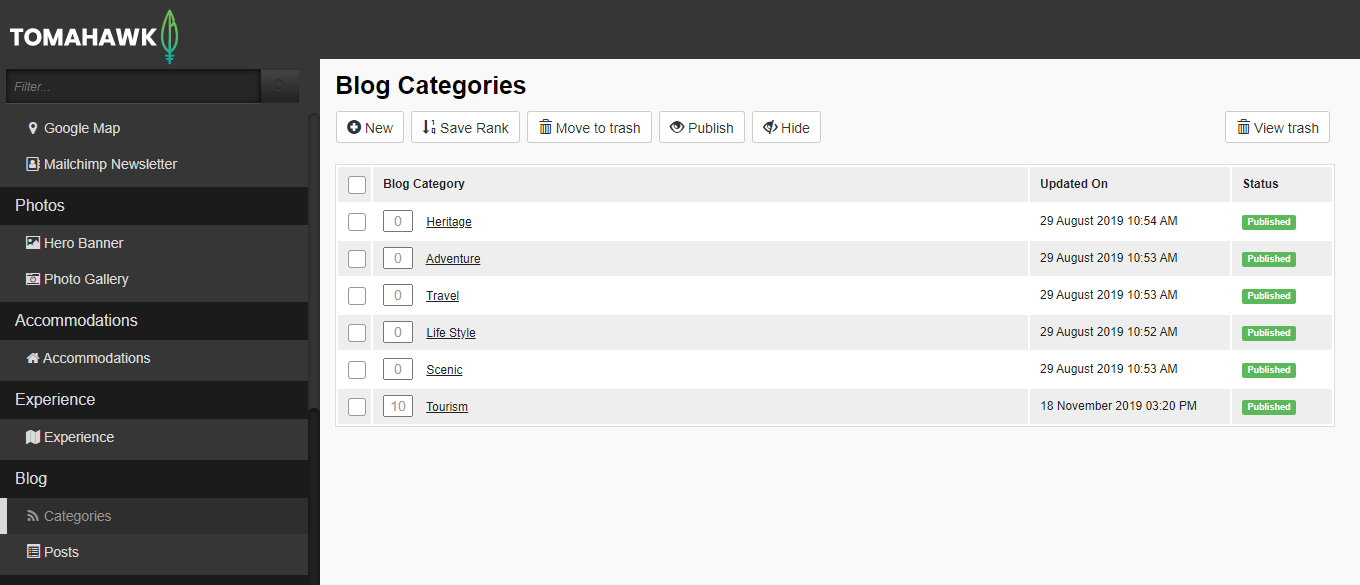
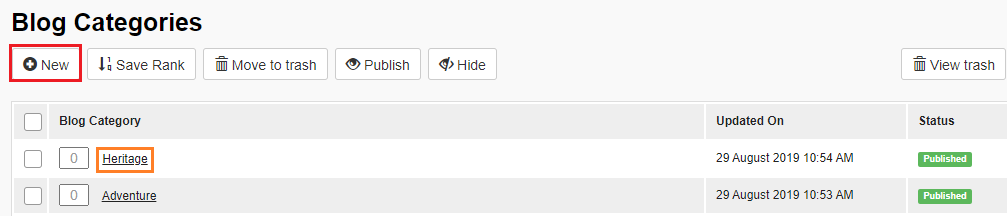
- You can either click on existing Category to edit it or click + New button at the top of the page to create a new category.
- Once the Category editor is open you will need to complete fields within the Settings tab for:
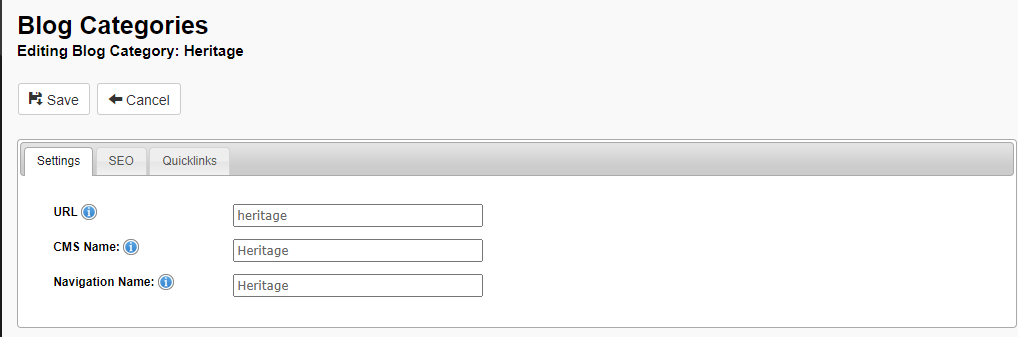
- URL: When a visitor to the Blogs Landing Page selects a Category from the Category menu or filter, the URL on the front end will change to this URL. In the example below, we have set the URL as Heritage. This means that Heritage the URL will populate the URL as https://www.yourwesbite.co.nz/about-us/blog/category/heritage/
- Your Domain: https://www.yourwesbite.co.nz/
- Parent Page: about-us/
- Child Page: blog/
- Category Menu has been selected: category/
- Category Selected: heritage/


This means that the URL can be shared, for example if you send out a newsletter or a post on social media to let your audience know that they can read articles on your website about this topic.
Please ensure that you use all lowercase letters and use hyphens (-) instead of spaces between words.
- CMS Name: This is the name of the Category that will appear within the CMS as the title.
When you complete the CMS Name and Navigation Name fields only, save your changes and exit out of the page, when you re-open the Category, you will see that the URL field has been filled in with the CMS Name in lowercase letters and using hyphens to replace any spaces between words.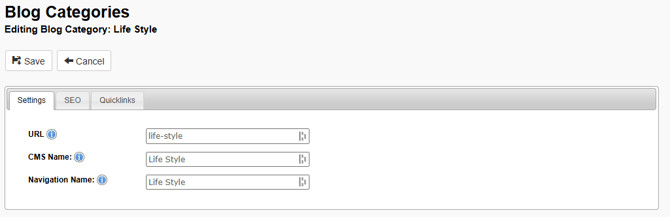
- Navigation Name: This is the name of the Blog Category that will appear within the Category menu or side bar that displays on the right-hand side of the Blogs Landing Page.

You can copy and paste the same title across all three fields.
- URL: When a visitor to the Blogs Landing Page selects a Category from the Category menu or filter, the URL on the front end will change to this URL. In the example below, we have set the URL as Heritage. This means that Heritage the URL will populate the URL as https://www.yourwesbite.co.nz/about-us/blog/category/heritage/
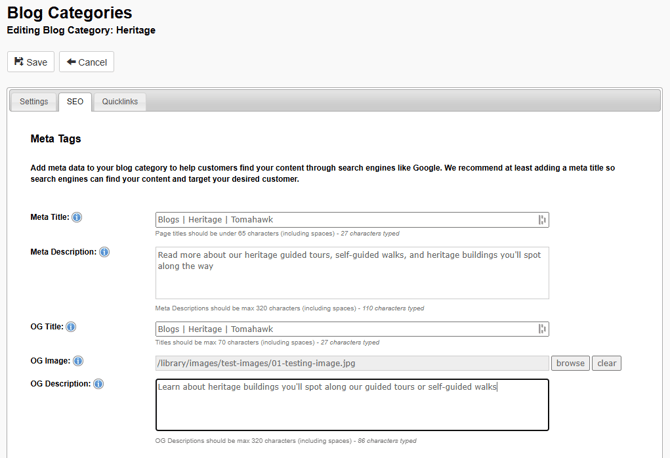
- Now select the SEO tab. Here you'll complete details to support the site being found in search engine results, where you will need to complete fields for:
- Meta Titles: This is the title of your Category as it appears in search engine results. It is a free text field and is limited to 65 characters, including spaces. The naming convention that has been used across all Pages is as follows: Child Page | Category | Your Business Name
e.g.: Blogs | Heritage | Tomahawk
- Meta Description: This is a short summary of the details of your Category as it appears in search engine results. It is a free text field and is limited to 320 characters, including spaces. It should be unique from the introduction field in the Settings tabs, with best practice incorporating keywords from keyword research.
- OG Title: This is the title of your Category when a link is shared on social media platforms such as facebook. It is a free text field and is limited to 70 characters, including spaces. The Meta Title can be used in this field.
- OG Image: This is the thumbnail image of your Category when a link is shared on social media platforms such as facebook. It is best practice to use the same image that is used in the Hero Banner so that the user is met with the same image when they click through to view the page, otherwise your business logo can be used.
- OG Description: This is a short summary of the content of your Category when a link is shared on social media platforms such as facebook. It is a free text field and is limited to 320 characters, including spaces. It is recommended to keep this text different from both the Introduction text from the Settings tab, and the Meta Description.
You can learn more about the SEO tab in our Guide to Meta Data
- Meta Titles: This is the title of your Category as it appears in search engine results. It is a free text field and is limited to 65 characters, including spaces. The naming convention that has been used across all Pages is as follows: Child Page | Category | Your Business Name
- Now select the Quicklinks tab. In this tab you can set Quicklinks to display on the Category Page that will display on its own URL e.g.: https://www.yourwesbite.co.nz/about-us/blog/category/heritage/ when a Category is selected from the menu on the right-hand side of the Blogs Landing Page. It is a great way to keep a visitor to the page on the site and continue browsing. Here you will need to complete fields for:
- Heading: A good way to help a user distinguish between sections of content on a page is to break it up by adding a heading. It is not compulsory to add a Heading.
- Description: To help introduce a new set of content, there is the option to also set text for an introduction or description. This field is limited to 250 characters, including spaces, so it should be kept brief. It is not compulsory to add a Description.
- Choose Quicklink Style: Choose from one of four options of styles that you can the display of a Quicklink.
- Choose Quicklinks: Select a Quicklink to display on a Page by checking the tick box next to the title of a Quicklink, a maximum of 3 Quicklinks to display on a page. These will be displayed at the bottom of the page underneath the primary page content.
You can learn more about how to create a Quicklink in our Guide to Quicklinks.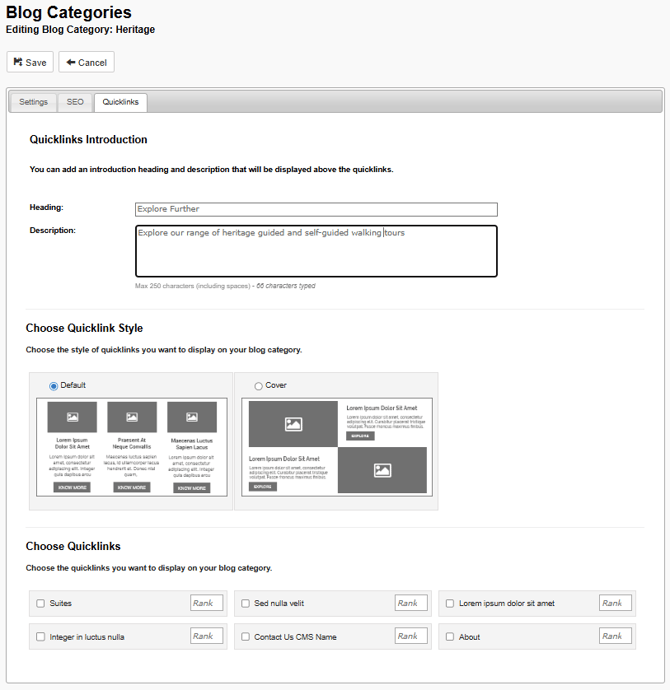
- Save: When all fields have been completed, select the Save button at the top of the page and you will be directed back to the list of all Categories where your Category will show that it has been saved as a draft or with a status of HIDDEN (orange).
- Save Rank: Scroll to the bottom of the Blog categories page to locate your Category that is HIDDEN / not yet published and enter the number or rank which will set the order that your Highlights will appear in within this list, as well as within the Category menu on the Blogs Landing Page, It is not compulsory to add a rank, however people like to see Categories sorted in alphabetical order which makes things easier to read.
If you wanted to update the order that these items appear in, such as in alphabetical order, you would enter the rank as follows: Adventure = 1, Heritage = 2, Lifestyle = 3, Tourism = 4, Travel = 5, Scenic = 6, then select Save Rank.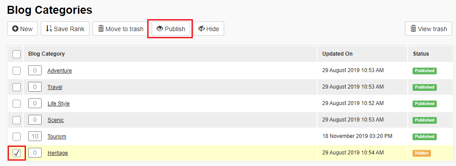
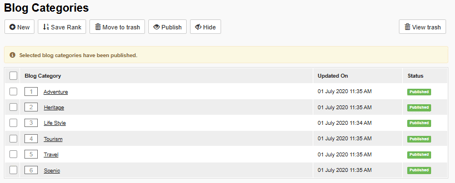
- Publish: Select the checkbox next to the name of your newly created Category still in draft (HIDDEN), then select the Publish button at the top of the page, and your Category is now available to select on a Blog Detail Page. It will now show in the Blog Categories list with a green status of PUBLISHED.
💡 Things to Remember:
- When you complete the CMS Name and Navigation Name fields only, save your changes and exit out of the page, when you re-open the Category, you will see that the URL field has been filled in with the CMS Name in lowercase letters and using hyphens to replace any spaces between words. You can also copy and paste the same text across all three fields.
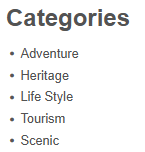
- When you first create, and then publish, a Category it will not automatically display on the Category menu on the Blogs Landing Page. A published Category needs to be selected on a Blog Detail Page and then saved, before it will display in the drop-down filter on the front end.
- When you Hide/Unpublish, or Move a Category to the Trash, on a published Blog, the Category will be removed from Blog Posts within the CMS. The Category will also no longer display within the Category menu on the Blogs Landing Page.
✍️ Ready to create a Blog Post?
See our guides on: