To complete this tracking, you may need access to:
-
Google Tag Manager
-
ResBook PMS Admin Panel
-
Google Analytics GA4 Property
NOTE These instructions assume the client already has UA Ecommerce Tracking Set Up
The below instructions outline the full process of creating GA4 Ecommerce Tracking for a ResBook PMS client. HOWEVER this is the shortcut using the importing function of GTM
GTM SHORTCUT
-
Go to GTM Container
-
Go to Admin Settings
-
Select Import Container

-
Choose Container File → Digital Performance Folder → Digital Marketing Templates → Tracking → GA4 Ecommerce Tag + variables - GTM Import.json
-
Choose Existing Workspace → Default Workspace/most recent workspace
-
Select Merge Import option
-
Should look like this

-
Confirm.
-
This will create the GA4 Ecommerce Tag, Trigger and 11 Variables needed for GA4 Ecommerce Tracking.
-
Open up new GA4 Purchase tag and ensure the Configuration Tag is the clients GA4 Variable.
-
Publish Container
-
You will need to wait till the next eCommerce purchase occurs to confirm this is working.
Creating GA4 Purchase Tag
-
Create a new GTM Tag and call it “GA4 Purchase Tag”
-
Tag Type = Google Analytics: GA4 Event
-
Configuration Tag = GA4 Configuration Tag (or your base GA4 install tag)
-
Event Name = purchase **must be lowercase
-
Create Event Parameters. This step is time-consuming but it is important. Event parameters are what translate the eCommerce data layers on the website to metrics GA4 can measure and report on. Each parameter needs to be set up as its own line, with its own customer variable as the value.
i. Let us step you through the first one for the Parameter Name of “value”
ii. Add an event parameter and call it “value”.
iii. In the Value field next to it, select the battery icon
iv. Then select the PLUS in the top right to create the custom variable.
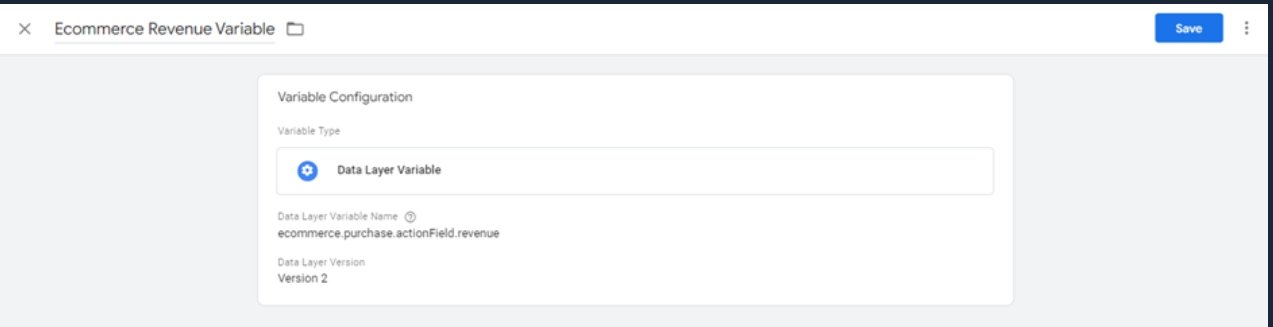
v. Name the Variable “Ecommerce Revenue Variable”
vi. Variable Type = Data Layer Variable
vii. Data Layer Variable Name: ecommerce.purchase.actionField.revenue
viii. It should look like the below. Push SAVE
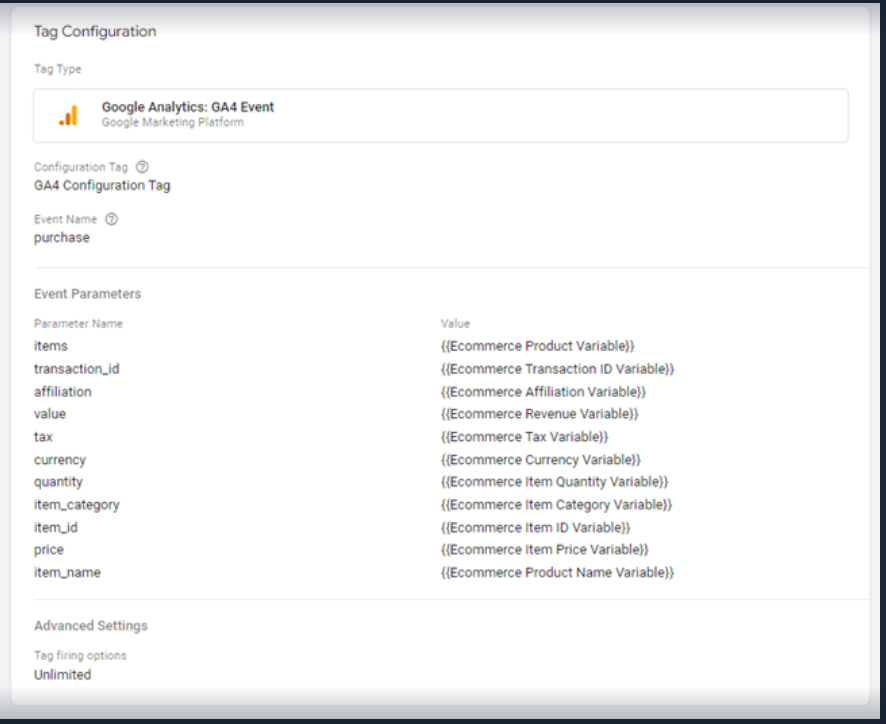
It should then look like the below in the GA4 Purchase Tag

6. This needs to be repeated for the other 10 variables below:
|
Parameter Name |
Value |
Data Layer Variable Name |
|
value |
Ecommerce Revenue Variable |
ecommerce.purchase.actionField.revenue |
|
transaction_id |
Ecommerce Transaction ID Variable |
|
|
affiliation |
Ecommerce Affiliation Variable |
ecommerce.purchase.actionField.affiliation |
|
items |
Ecommerce Product Variable |
ecommerce.purchase.products |
|
currency |
Ecommerce Currency Variable |
cCurrency |
|
item_category |
Ecommerce Item Category Variable |
ecommerce.purchase.products.category |
|
item_id |
Ecommerce Item ID Variable |
|
|
price |
Ecommerce Item Price Variable |
ecommerce.purchase.products.price |
|
quantity |
Ecommerce Item Quantity Variable |
ecommerce.purchase.products.quantity |
|
item_name |
Ecommerce Product Name Variable |
|
|
tax |
Ecommerce Tax Variable |
ecommerce.purchase.actionField.tax |
After completing doing so, it should look like this
7. Set the Trigger for the tag
8. Click the blue Plus to create a Trigger
9. Name the Trigger “GA4 Purchase Trigger”
10. Trigger Type = Custom Event
11. Event Name = RBTransactionComplete
12. This trigger fires on = All Custom Events
13. Save
14. Last step is to Publish the container.