How to Add an Agent Contact in ResBook PMS
ResBook PMS defines Agents in the context of someone who arranges travel for end clients (individuals, groups, etc) on behalf of the property. It also includes all online third-party travel agents.
To add an 'Agent' as a contact follow the steps outlined below:
|
Step 1: Use the navigation menu across the top of the ResBook PMS site and select [Contacts]. Then select [Create].
|
 |
|
Step 2: Select [Agents] as the Contact Type at the top of the page. |
 |
|
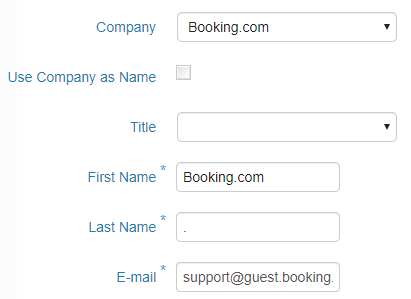
Step 3: Select the company you want the Agent to represent and then select whether or not you want to make the Company the name of the Agent. |
 |
|
Step 4: Enter the following details. All fields marked with * are compulsory.
|
 |
|
Step 5: If you have the Mailchimp module added to your system, you can select the list options.
|
 |
|
Step 6: Select the additional payment settings. This is applicable only to Agents booking via your website with Instant confirmation set to on. These settings do not apply to properties on Enquiry.
|
 |
|
Step 7: Select the Agents commission rate.
|
 |
|
Step 8: Create a Username and Password for the Agent.
|
 |
|
Step 9: An image of the agent can also be uploaded if required, click [Choose Files] and locate the image on your computer. |
 |
|
Step 10: Once all fields are filled in, click [Create Contact]. The details will then be saved and displayed. |
 |
Please note:
- Agents which are supplied with the username/password should be making the booking via your online website calendar. They will not be able to log into ResBook PMS.
- To receive notifications inside ResBook PMS with the Agent name on it, do not tick [Use Company as Name] (Step 3 above) and instead add the name of the Agent or channel as a first name.

- The use of the Company field is optional.

